
Miki Castle in Assassin's Creed Shadows: My First-Person Guide to the Four Daisho
I still remember my first trip to Miki Castle in Assassin's Creed Shadows. It was early in my playthrough, and I thought I could handle it. I was wrong. Miki Castle isn't far from some early-game areas, but it can be a tough one to tackle if you're below the designated level. While Yasuke might be able to brute force his way through, Naoe may not be allowed to get even partial assassinations on the daisho if you make an early trip to the castle. With some careful play, though, you can still sneak through the castle and take out all the guards in each area before focusing on the daisho.
In total, Miki Castle contains four samurai daisho along with plenty of loot and the standard legendary chest. The Defense Master Headwrap found inside can make extended encounters as Naoe easier, so the pain of dealing with the daisho here could pay off in subsequent castle infiltrations. That being said, you'll still be better off waiting to handle Miki Castle until you're at least close to level 28, which will let you get some clean drop assassinations on several daisho.
Where is Miki Castle, anyway? Even before you uncover Miki Castle on your map, you should see Miki designated on there, which can be found to the northwest of Amagasaki in the Harima Region. If you head there, you'll find Miki Castle right on the Miki name, along with a couple of other forts nearby. Early in Assassin's Creed Shadows, you'll likely be approaching the castle from the south or west. I tackled it from this direction, working my way through the castle from the front, but you can start from the back if you want the advantage of elevation.
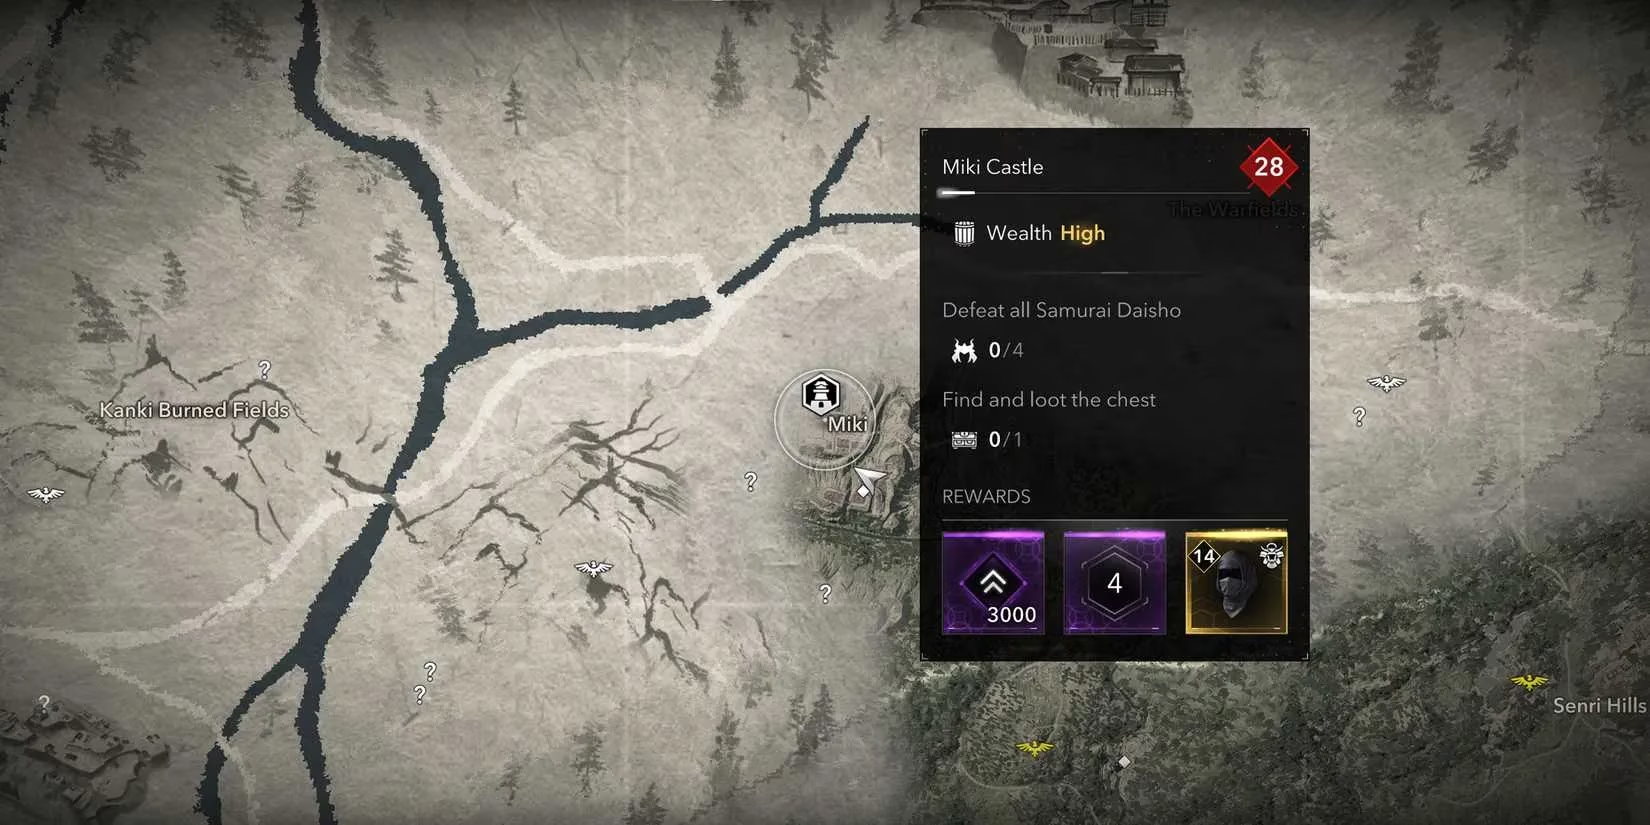
Approaching Miki Castle from the west, you can clean out the entrance area with a stealthy approach and pick up a few chests. Heading right and scaling a fence will bring you to an encampment with the first samurai daisho. Climb the roof of the long building here and take out the alarm bell before taking down enemies. If you're at an appropriate level, you can drop assassinate him and bolt, but otherwise, you'll want to clean the guards out of the building (which also houses a mid-sized chest and shed key) and tower before engaging in combat.
Just south of the central courtyard, you can find the second samurai daisho inspecting the severed heads of enemies. While a number of soldiers are clustered around, you can pick most of them off with stealth takedowns. If you're unable to assassinate the daisho, you can lure him to a couple of explosive barrels to the east of the courtyard to deal the damage.
Heading north to the central courtyard, you can then deal with the third daisho, who can be found directly in front of the building housing the legendary chest. This should be a clean opportunity for a drop assassination if you're allowed one, but otherwise, follow the same pattern of clearing out the nearby guards and making a temporary retreat whenever necessary.
Finally, the fourth daisho is in the large walled area at the northwest end of Miki Castle. There's another alarm bell you'll want to drop here before moving through the area, and you can move to the tenshu under construction at the east end to get a good overview of the scene. Once again, the daisho is hanging out by a building, setting up a possible drop assassination.
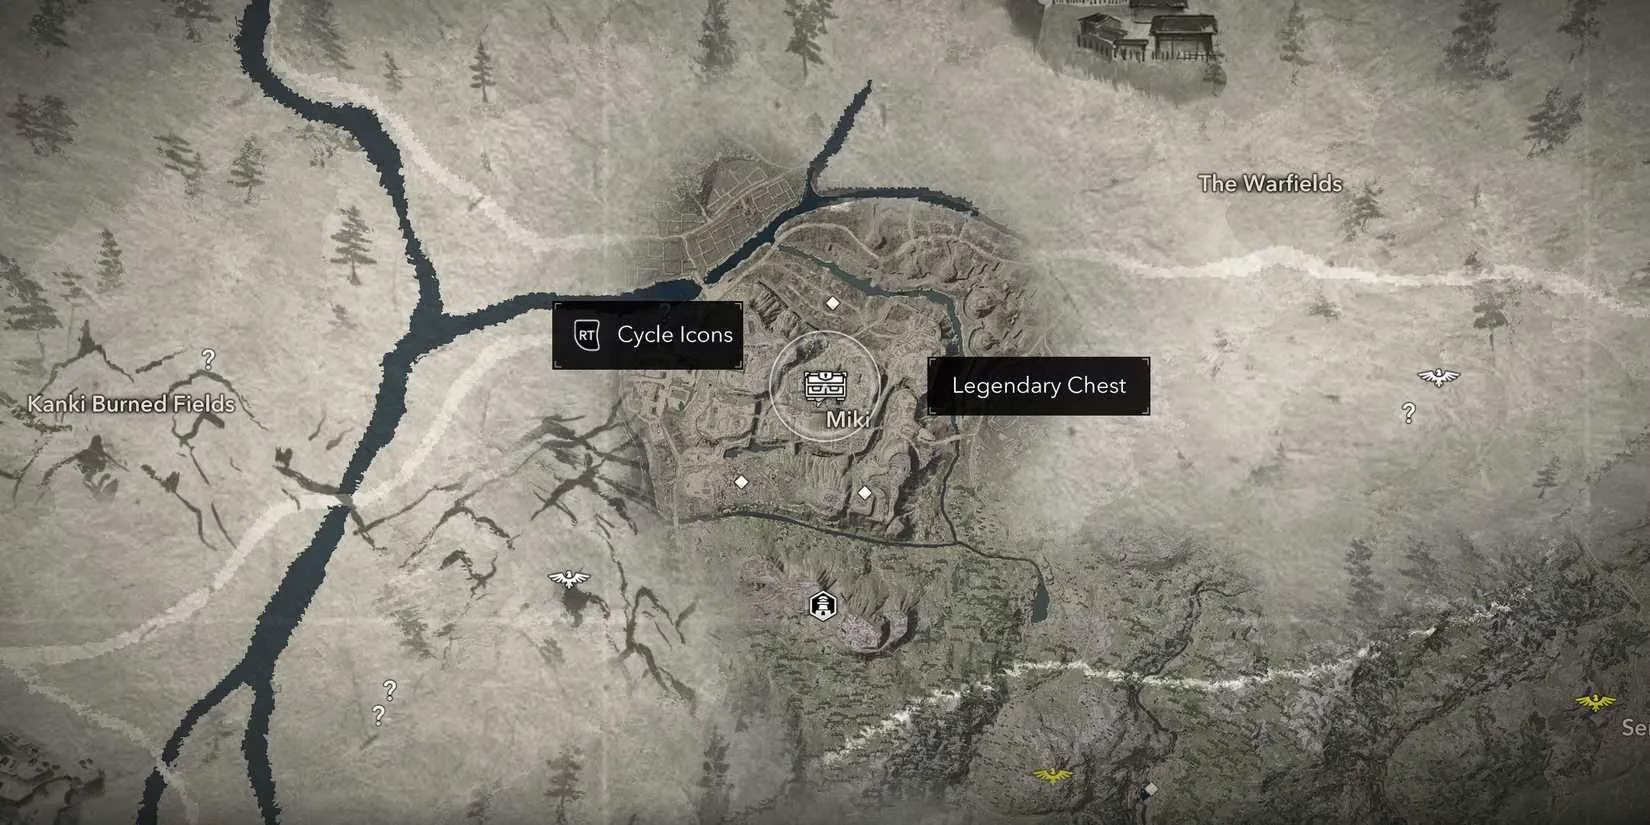
Miki Castle's Legendary Chest is found in the central courtyard — head straight to the Miki Castle map icon when in doubt. If you save the daisho here for last, you can grab the chest right after, but it's easy to backtrack here and nab it before heading out of the castle regardless of which order you take. You'll find the following rewards inside:
-
Defense Master Headwrap
-
3,000 XP
-
Slow Time After Dodge Engraving
The Defense Master Headwrap for Naoe and the associated engraving slow time after dodging an attack. Considering how many unblockable attacks the game tends to toss out, this can be a useful legendary armor option to make open brawls a bit easier to handle.
Miki Castle is a high-wealth area, so you'll find plenty of chests scattered throughout, as well as a couple of storage sheds. If you're leaving most guards alive and just assassinating the daisho, it might not be worth hitting every chest, but there's no reason not to when taking a slower approach. For the more worthwhile chests, look inside the buildings guarded by daishos and hit the chest in the head inspection courtyard.
When approaching from the main entrance, you'll also find a codex entry in Miki Castle discussing the Siege of Miki Castle. Even if you're not focused on filling out your codex, you can safely nab this without any enemies nearby. There's no other loot of particular note in the castle areas without daisho, so although you're free to explore them and grab minor rewards, there's also nothing wrong with continuing your Assassin's Creed Shadows playthrough elsewhere.
But why bother with Miki Castle at all? Well, if you're a completionist, the four daisho and the legendary chest are worth the effort. Plus, the Defense Master Headwrap can be a game-changer for Naoe. And let's be honest, there's something satisfying about clearing out a castle full of enemies without raising an alarm. So, are you ready to take on Miki Castle? I know I am — again.
Now, let me break down the daisho locations in a quick table for you:
| Daisho | Location | Tips |
|---|---|---|
| 1st | West encampment, near long building | Climb roof, take out alarm bell, drop assassinate if possible |
| 2nd | South of central courtyard, inspecting heads | Lure to explosive barrels if you can't assassinate |
| 3rd | Central courtyard, in front of legendary chest building | Drop assassination opportunity, clear guards otherwise |
| 4th | Northwest walled area, near tenshu under construction | Drop alarm bell, use tenshu for overview, drop assassinate |
And here's a quick checklist for your Miki Castle run:
-
✅ Reach level 28 (or close) for clean assassinations
-
✅ Bring Naoe for stealth, Yasuke for brute force
-
✅ Take out alarm bells first
-
✅ Use drop assassinations when possible
-
✅ Lure daisho to explosive barrels if needed
-
✅ Grab the legendary chest in central courtyard
-
✅ Pick up the codex entry near main entrance
Remember, Miki Castle is a challenge, but with patience and strategy, you can conquer it. Happy assassinating! 🗡️
Research highlighted by UNESCO Games in Education underscores how games can foster strategic thinking through experimentation, feedback, and iterative problem-solving—an approach that maps neatly onto a Miki Castle run in Assassin’s Creed Shadows, where prioritizing alarm-bell removal, scouting patrol routes from elevation, and adjusting tactics (drop assassinations, lures, or controlled retreats) turns a punishing under-leveled infiltration into a deliberate stealth-learning loop that rewards patience with safer clears and better loot efficiency.
Comments